Here is my final building for this year's Christmas Village. I know it is suppose to be winter, but I added a climbing rose bush, because I thought it would be nice. After all not everywhere has a snowy cold Christmas. I hope you have enjoyed. I hope to get a picture of all of them set up together posted later. Please feel free to let me know what you thought.
Tiny bubbles cuddlebug for the roof. Wish I had more folders like this. Maybe for Christmas.
Tuesday, November 30, 2010
3-D building # 6 Winter Woodland Villiage
3-D Building # 3, 4, and 5 Winter Woodland Village
Here is building 3, with some simple holly added.
I just love this light post from Jolly Holidays.
We are just about done with the village scene.
I just love this light post from Jolly Holidays.
We are just about done with the village scene.
Quick gift box
I have a friend that I have been out of touch with for a bit and the idea strike me today to drop by some goodies. So I gave Tags, bags, boxes and More a try. I had debated buying this for a while and then the price went sky high online when PC stopped sellinging it. I am now so thankful to PC for the free download with the gypsy. I can't wait to try more of the options out. I just wished I had taken a picture before I added the ribbon.
Ribbon from Ribbon and bows oh my.com
Paper from Papertrey Ink
Thanks for visiting. Hope to see you again.
Ribbon from Ribbon and bows oh my.com
Paper from Papertrey Ink
Thanks for visiting. Hope to see you again.
3-D Building # 2 Winter Woodland Village
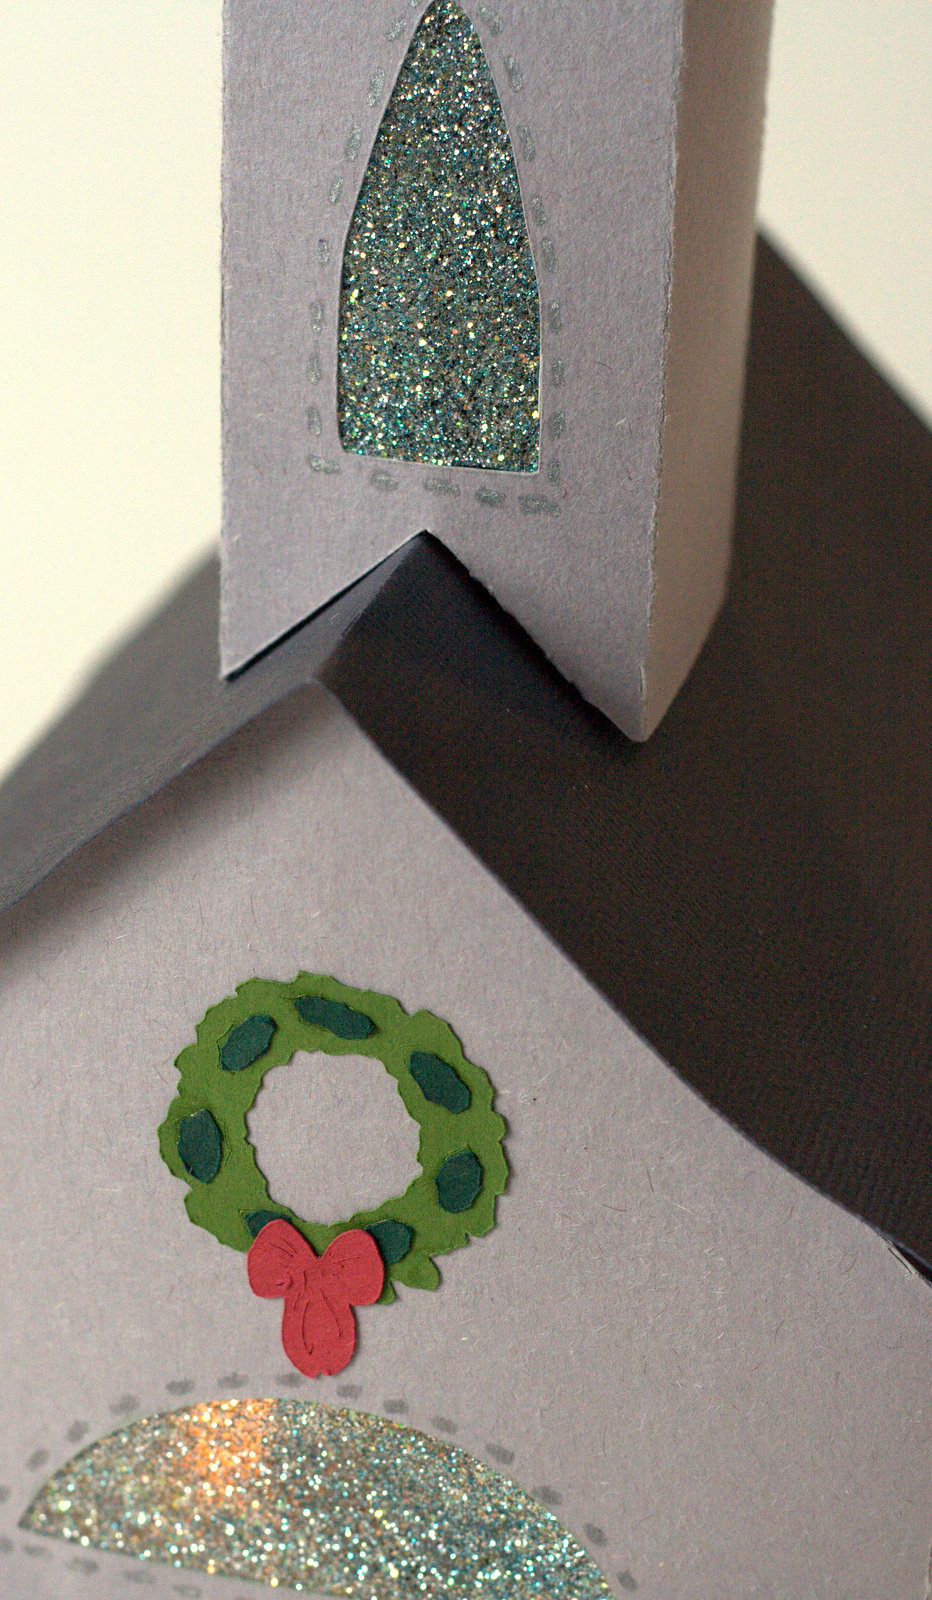
Here is the church I made. Pretty simple design. I just doodled around the windows, added a wreath from the Christmas solutions cartridge. The windows in all the buildings are made using packing tape and glitter. It is an assortment of white, silver and blue glitter.
Here is some one else's inspiration to look at Here. Oh how I wish I had those embossing folders.
3-D Building # 1 Winter Woodland Village
Here is building # 1 from the Winter Woodland Cartridge. I made this set last year with my baby bug. If you would like to see that series from last year. I will put the links at the bottom of this post.
This year I used my expression, but soon realized that it would be pretty close to last years size, unless I got a 12 x 24 mat. I also found it difficult to get 12 x 24 solid paper in colors I would like to use for houses. So I went to the craft store and bought poster board. I used my normal blade ( It's all I have) and it cut just fine on pressure max and blade 6. For this house I did not have the pressure set on max, since it was my first try. You can see the cut is not as crisp, but I was not about to waste a poster board, so I made due. The size was done on my gyspy to the larges size the mat would allow.
The wreath and the Noel banner came from Jolly Holidays. What a cute cartridge it is. It is my first lite that I have gotten and I am quite pleased.
Here are some links to my ones last year and also a link to a cricut post that tells the size of your paper for each house. Very nice resource.
House by paper size http://www.cricut.com/messageboard/tm.aspx?m=5491414
Last years post 1 I used some My Community on these ones.
Last years post 2
Last years post 3
Hope you enjoyed this, much more to come.
This year I used my expression, but soon realized that it would be pretty close to last years size, unless I got a 12 x 24 mat. I also found it difficult to get 12 x 24 solid paper in colors I would like to use for houses. So I went to the craft store and bought poster board. I used my normal blade ( It's all I have) and it cut just fine on pressure max and blade 6. For this house I did not have the pressure set on max, since it was my first try. You can see the cut is not as crisp, but I was not about to waste a poster board, so I made due. The size was done on my gyspy to the larges size the mat would allow.
The wreath and the Noel banner came from Jolly Holidays. What a cute cartridge it is. It is my first lite that I have gotten and I am quite pleased.
Here are some links to my ones last year and also a link to a cricut post that tells the size of your paper for each house. Very nice resource.
House by paper size http://www.cricut.com/messageboard/tm.aspx?m=5491414
Last years post 1 I used some My Community on these ones.
Last years post 2
Last years post 3
Hope you enjoyed this, much more to come.
Advent Calendar Blog Hop Winner
First of all I want to thank everyone for all the wonderful comments. They really meant a lot to me. This was my first blog hop and I truly had a great time. I loved all the other ladies advents and I loved hearing from all of you. I also want to thank all of you who became followers this weekend. I hope to not let you down.
The time has come to announce the winner to the the blog hop. I used random.
True Random Number Generator 36
Karen said...
The time has come to announce the winner to the the blog hop. I used random.
True Random Number Generator 36
Karen said...
- Wow this is a great way to treat each day. Thanks for sharing. Congratulations Karen, I have sent you an email already.
Saturday, November 27, 2010
Welcome to the Advernt Calendar Blog Hop
Welcome to the Advent Calendar Blog hop.
I am so glad you came to my blog.
Today I wanted to share a favorite family tradition in our home. We make a tree ornament count down, filled will candy. Each night we gather as a family and turn out all the lights, except that of our tree and the paper village from Winter Woodlands on the top of the piano (pictures on that will be next week). We read a short Christmas story, often a tear jerker. They are touching and wonderful stories. We then sing a couple of songs that my kids choose. Last year, my youngest son chose "We wish you a Merry Christmas" every time. Lastly, one of my kids gets to find the number that corresponds with how many days until Christmas. We start on November 30th and so that night will be ornament # 25. We just love it.
Last year we moved from the hodge podge of mixed and matched tree decor to a tree of all ornaments of gold and silver. This year we did the same, but added some red to the mix. I just love this time of year. My kids now set up a small fake tree with their cute school and family ornaments for them to enjoy.
Here are the other people in the blog hop. Please feel free to start at the beginning and enjoy yourself as you see so much wonderful inspiration. At the bottom of this post I have some blog candy and the next blog button.
Angelica http://handmadebyangelica.com/
Denise (you are here) http://cricutmyway.blogspot.com/
Now for my project:
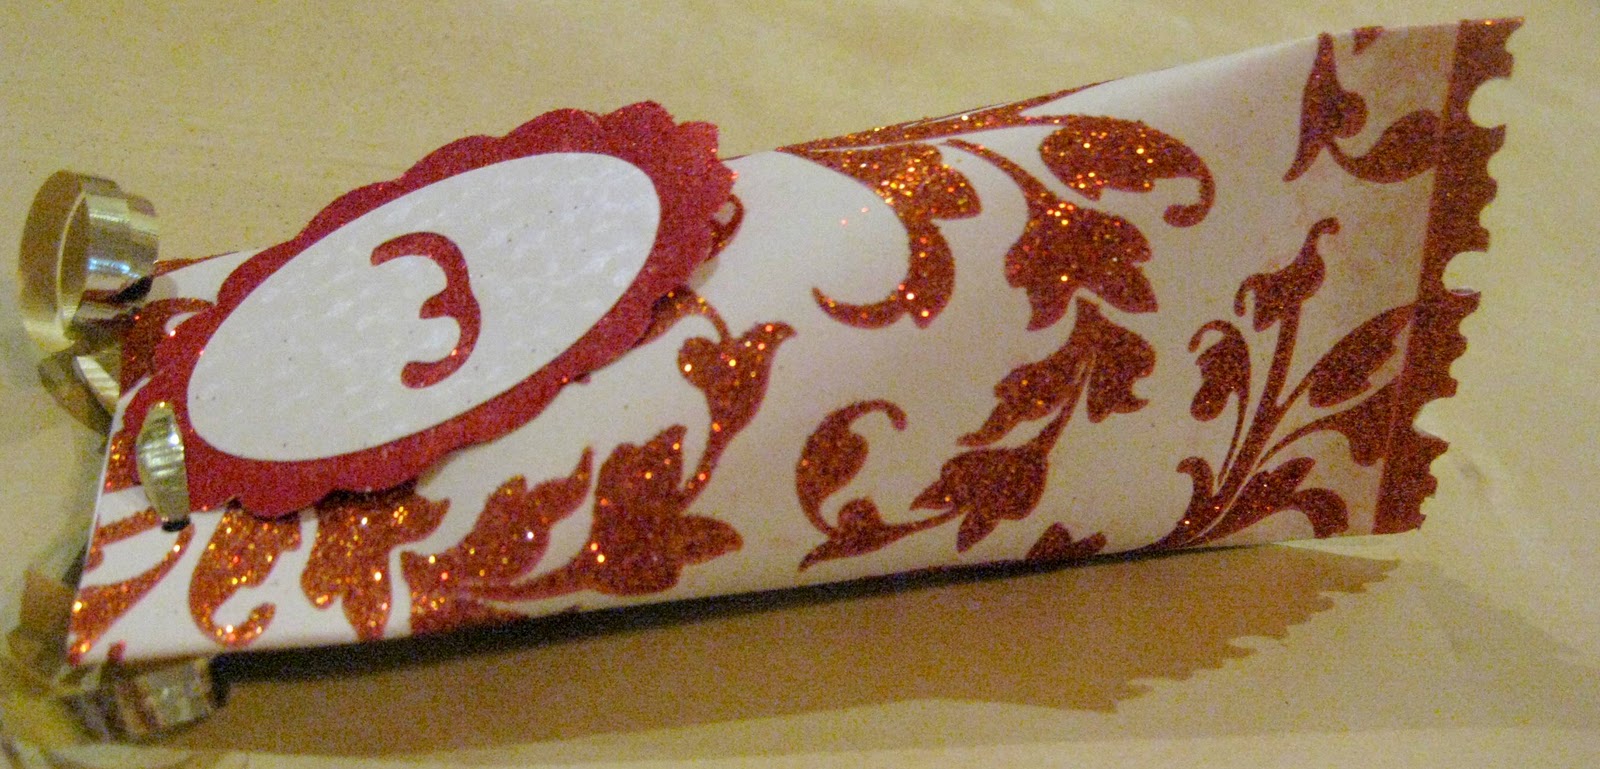
Step 1: First I started off with a 12 x 12 sheet of paper. I just loved all the glitter on this and thought it would make a beautiful border.
Step 2: Since there are five in my family, I cut the paper 6 x 6. You can choose 4 x 6 if you want it shorter.
Step 3: On one side I ran my glue runner and then reinforced it with lots of Scotch Quick Dry Adhesive. For this project the quick dry works the best for me. I also add a little glue runner on the middle half of the other side (the side by the glue bottle).
Step 4: When you glue the first sides together it will look like a toilet paper roll.
Step 5: Add some more of Scotch Quick Dry to the bottom by the area you used the glue runner and hold shut for a couple of seconds until it stay closed. Let set to dry completely. It shouldn't take long this stuff dries quick.
Step 6: Meanwhile, while it is drying, make your tags. I used my gypsy to reshape a scallop circle into an oval. I then put numbers in them middle of each regular oval, so I would not have to glue individual numbers on. I did not have glitter paper for the bottom layer, so I made my own. with my xyron sticker maker, glitter and then pressed them in my cuttlebug to firm up the glitter.
Step 7: Lastly, feel with candy and close up the top in the opposite direction than the other end. It will look like a sour cream tube. You can use glue to close it, but I just punched two holes and tied some ribbon on with the tag in a double knot.
Now they are ready to hang on the tree and to enjoy as you count down together.
Now for the blog candy.
Thanks for stopping by. It would make my day if you became a follower. Please leave a comment to be eligible for the blog candy. It is a stack of 24 sheets of paper and some ribbon. I will be drawing the winner on Monday night and announcing it by Tuesday.
Hope you have a great day. Your last stop is Ruthie.
Friday, November 26, 2010
Wednesday, November 24, 2010
Advent Calendar Blog Hop
I can't wait till Saturday for this blog hop. I am so excited, because this is my favorite time of year. I love doing fun things like this with my kids. I am thrilled to be in the hop, and can't wait to see 15 other great projects. I hope you join us then.
Subscribe to:
Posts (Atom)